Design & Planning
I started planning my model railroad layout near the end of January 2010. I
was initially going to build it in my office but opted for my basement.
Though my office would have been a more comfortable working space, it was
tight for space. Furthermore, my two cats accessed their food and litter
boxes through this room, and I didn’t want them on my layout. The space in
my basement could just barely fit a 4’ x 8’ standard sheet of plywood so
this was the layout size I decided on.

|
| The original modified figure eight layout that my track layout is based off of. |
Using Atlas Right Track software, I spent the next several days adapting
this track plan to fit onto a 4’ x 8’ space. My final layout stayed quite
true to the original; a figure-eight track line surrounded by a separate
oval line. Both lines joined briefly at a small staging area at the front
of the layout where trains could cross over from one line to the
other.

|
| A sketch of the original scenery plan for my layout. The coloured dots on the track indicate elevation levels. |
One of the biggest benefits of using track software was that I could
ensure my track curves were at least an 18-degree radius or larger.
After printing out my track plan, I started drawing out the rest of my
layout. This included track and terrain elevations, grades, tunnels,
bridges, roads, buildings and scenery.
As I was working on my track layout, I also started planning how I was
going to build my benchworks. The stairs leading down into my tiny
basement were extremely steep and narrow, so fitting a full 4’ x 8’
sheet of plywood down them was out of the question. I decided on a table
that would come apart into two 4’ x 4’ sections that bolted together,
along with removable legs. This would allow me to more easily get the
benchwork in and out of my basement.
After coming up with a detailed benchwork plan, complete with
measurements and diagrams, I began cutting the lumber and building the
two 4’ x 4’ tables. The frame and legs were built from standard 2x4
lumber while ¾” plywood was used for the table’s surface. Once the two
tables were built, I bolted them together to form the final 4’ x 8’
benchwork.

|
|
A rendering of the final 4x8 benchwork support structure
design. The extra vertical supports on the left half are for the
control panel. |

|
| Rendering of the final 4x8 benchwork support structure design with the addition of my folding control panel and winch system. |

|
|
Original planning sketch with measurements for my 4x8 benchwork
table. |

|
|
Resistor PC board diagram showing components and references to
trackside signal numbers. |

|
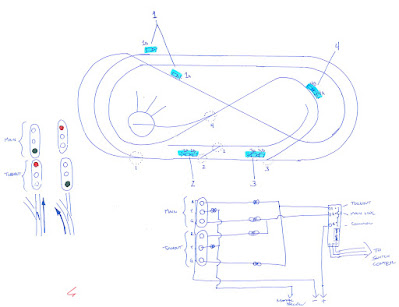
| The original wiring diagram for my layout. This changed a bit as I built my layout but still has a very close likeness to the final wiring diagram. |

|
|
My final master wiring diagram for my layout. This includes all
wiring on my layout including the control panel and layout
components. |

|
|
A scale sketch of my trestle. I drew this to scale on
newsprint then built the trestle directly over top of the sketch.
|

|
| Floor plan of my basement showing layout location. |


